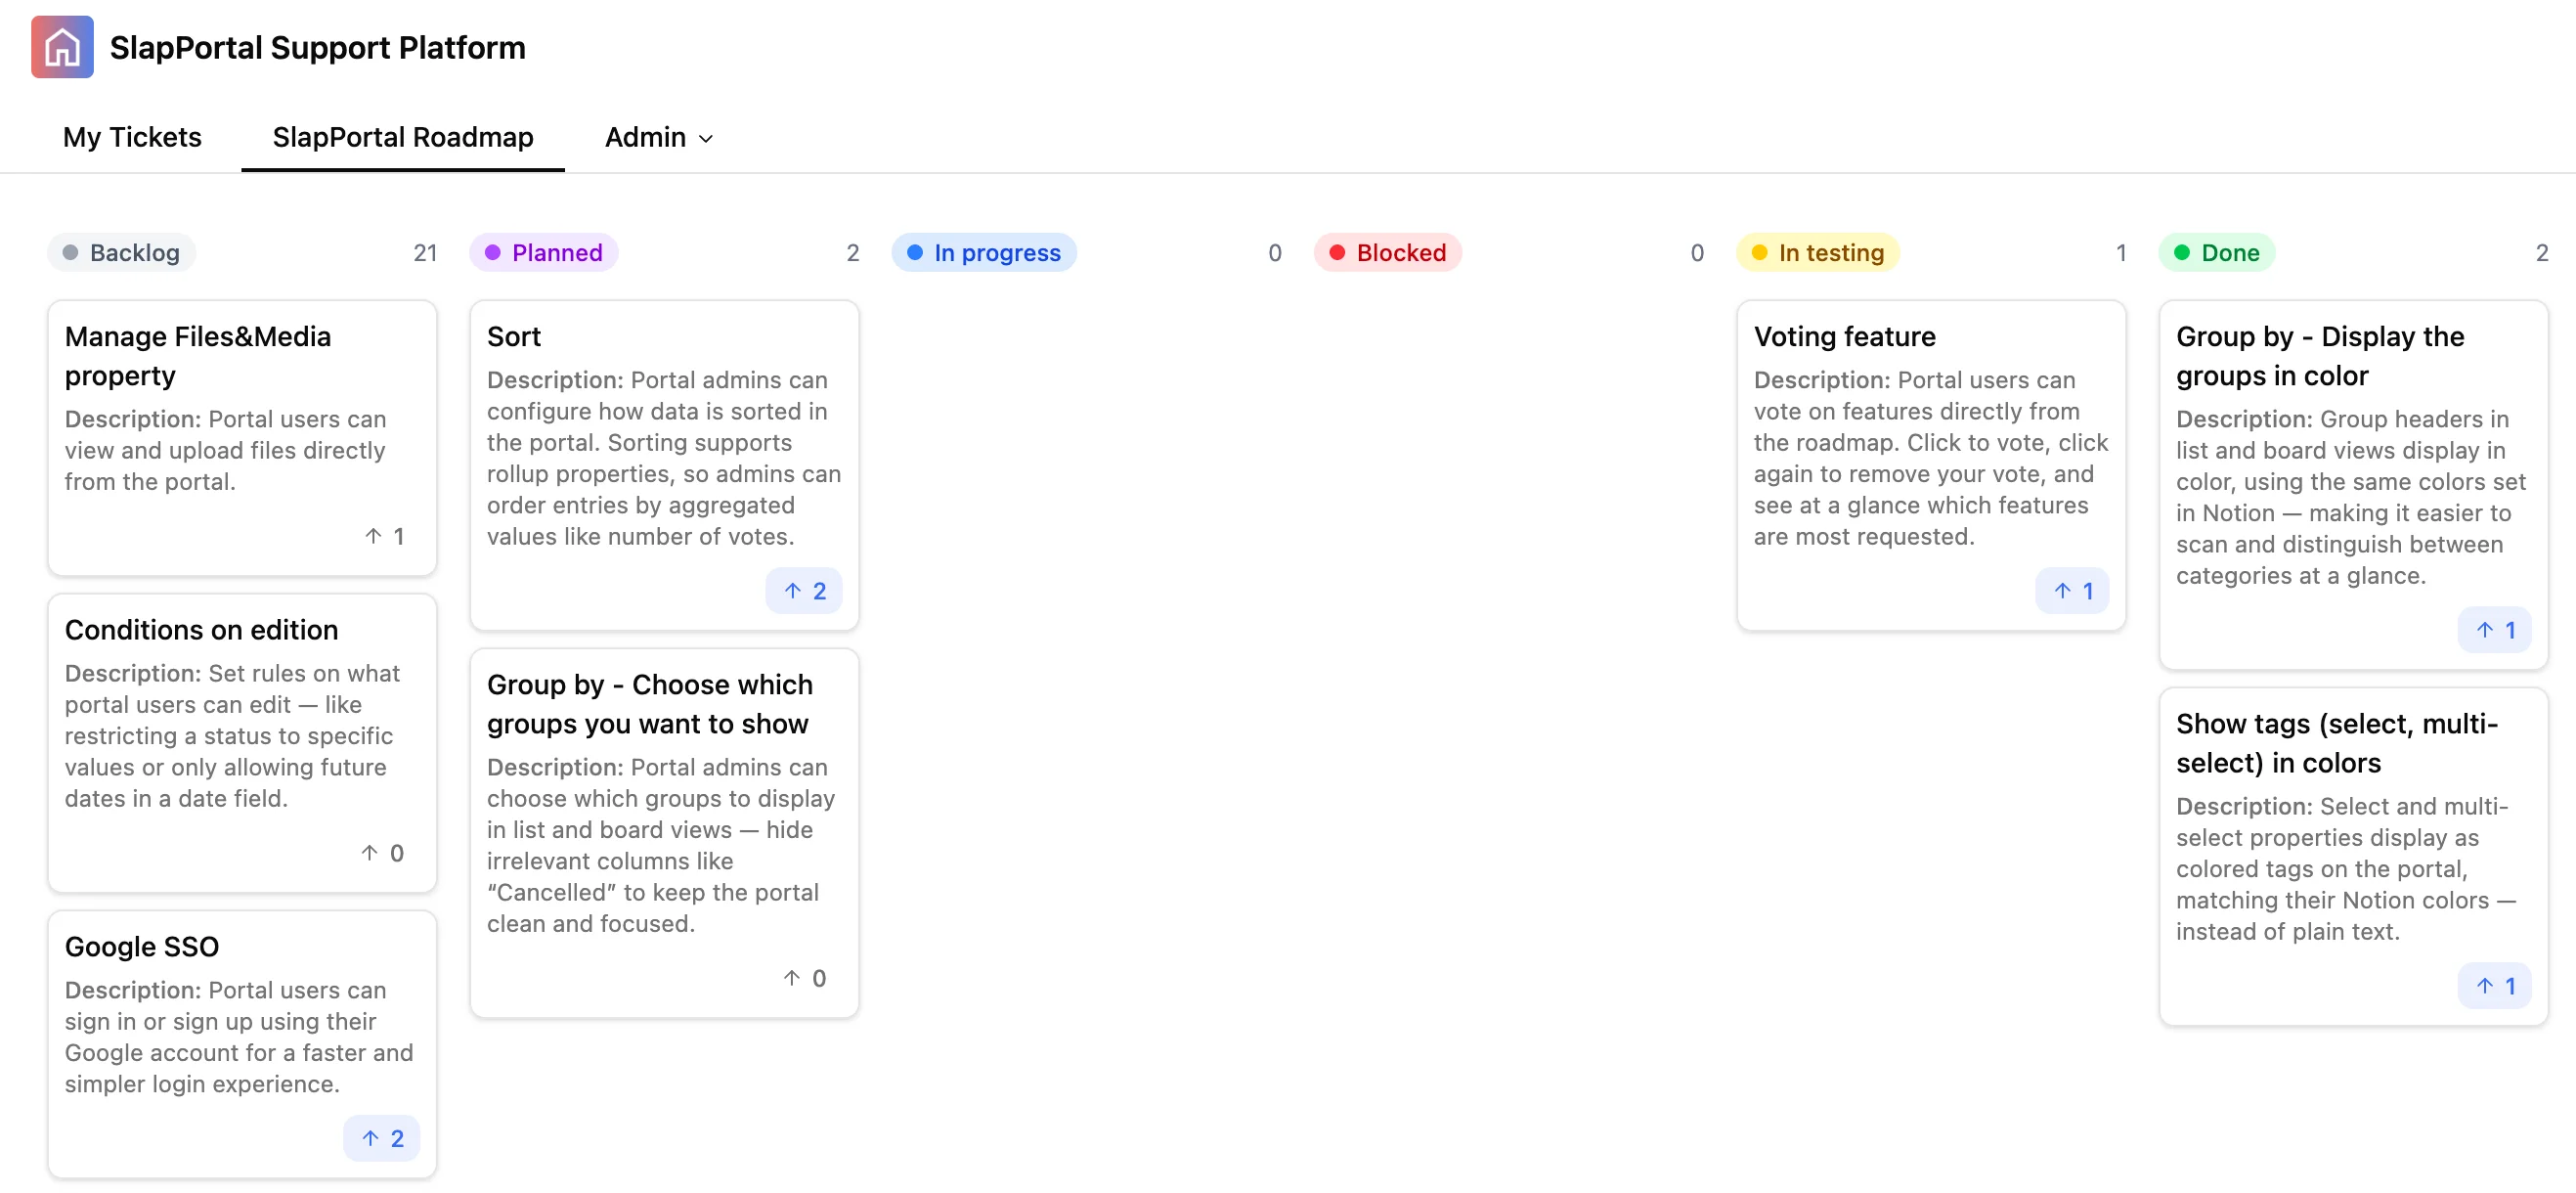
Voting
Portal users can vote on pages directly from your portal. Click to vote, click again to remove a vote, and see at a glance which items are most requested.
How it works
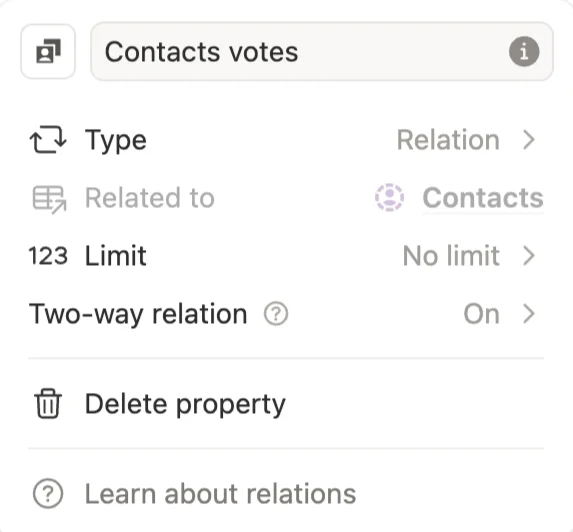
Voting is powered by a Notion relation property that links your data source to your users database.
- When a logged-in user clicks the vote button, they are added to the relation property on that page.
- Clicking again removes the user from the relation, effectively removing their vote.
- The vote count is calculated from the number of records in the relation property.
- If the logged-in user has already voted, the vote icon appears in blue.
Setup
Prerequisites
Before enabling voting, make sure your data source has a relation property that links to the database where your portal users are stored.
The relation must be a two-way relation. One-way relations are not supported and the feature will not be available.
Enable voting
- Go to Admin > Tabs and select the tab you want to enable voting on.
- In the tab settings, find the Allow upvoting option and enable it.
- Select the relation property that links to your users database.
- Set a label - this is the name that will appear to your portal users (e.g. “Votes”).

Current limitations
- A single user can vote on up to 100 pages across the database. Once this limit is reached, the user must remove an existing vote before voting on a new page. The user will receive a warning if this happens.
- Vote counts displayed in the board or list view show the exact number up to 25. Beyond that, the count displays as 25+.
- The full vote count is visible when opening the page.