Notion Forms are a powerful tool for collecting structured information directly within Notion, especially from external parties like clients, users, leads, and suppliers.
You might be wondering: ‘Can Notion actually replace my current ticketing system?’ It’s a great question because while Notion Forms excel at capturing initial requests, they lack native support for ongoing conversations. Submissions go into your Notion database, but you can’t respond directly to the person who submitted it from Notion. That’s where it gets tricky…until now!
Enter Slap: it’s the missing piece that bridges this communication gap and enables full, two-way communication. In this post, we’ll explore how you can use Notion Forms and your existing support Gmail mailbox to create a fully functional ticketing system within your Notion workspace. Imagine handling all your client communication right in Notion, without ever leaving your happy place. Let’s get started!
Your Notion Ticketing System in action
Before we get into the nitty-gritty of the setup, let’s take a quick peek at what this ticketing system will look like for you and your clients.
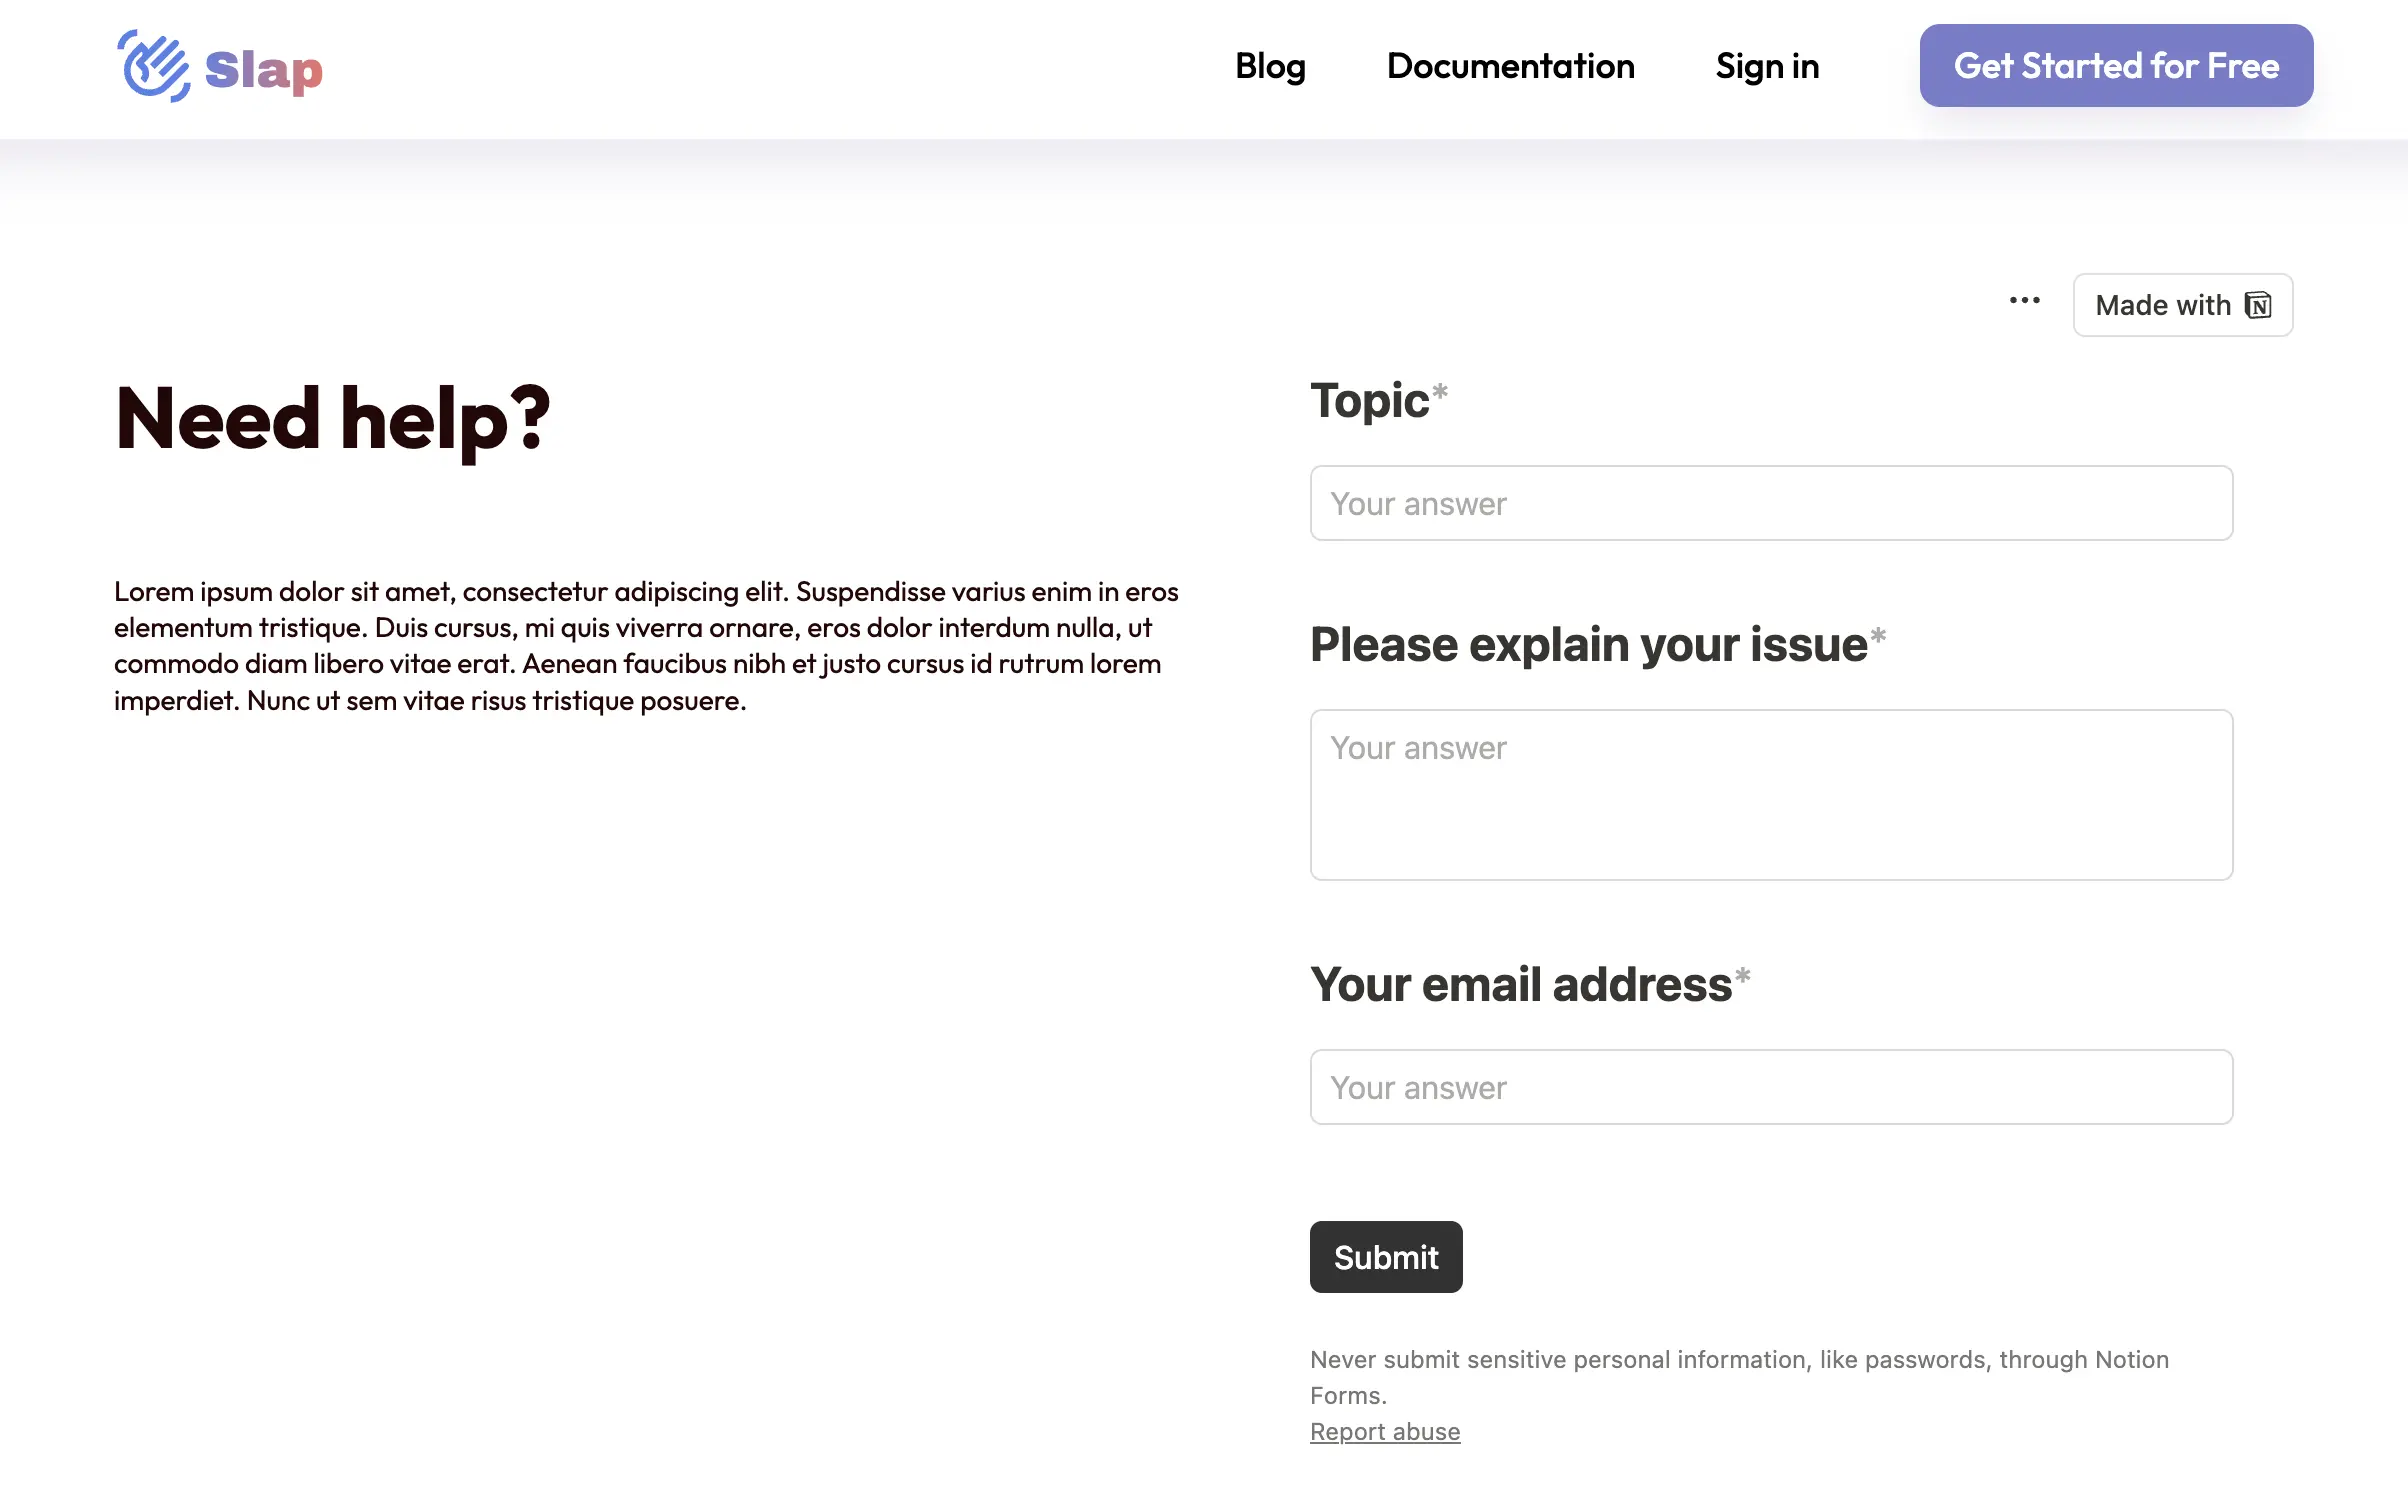
What your client will see is a version of this form that can easily be embedded on any webpage (so visible on your website, your web app, etc.):
Once it’s been filled in, the form arrives in your Notion database (Pro tip: activate the notifications to get informed when you have a new form submission):
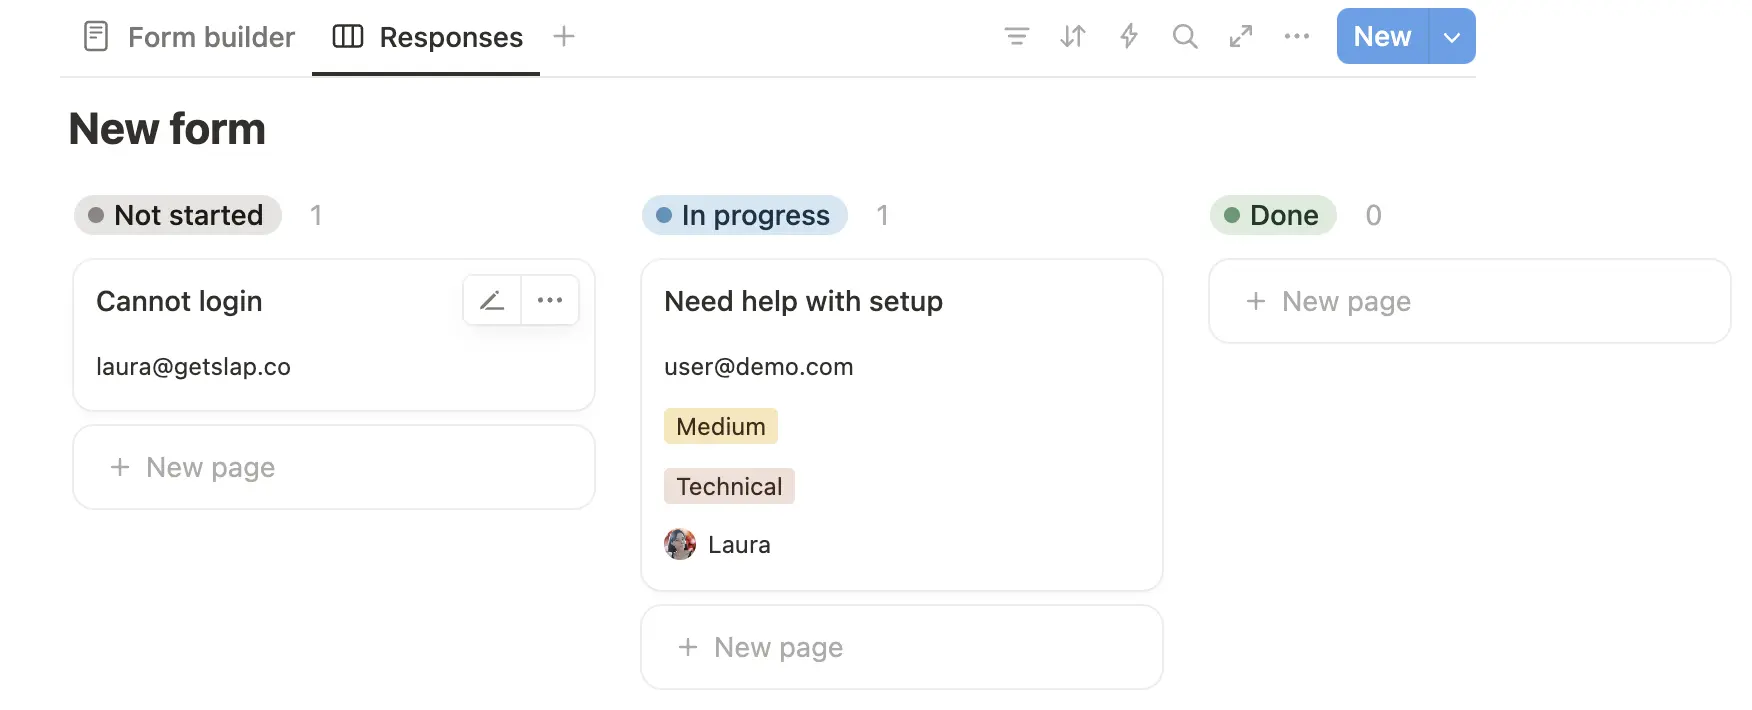
All the information is already in the right place. You can benefit here from all the customization options that Notion offers to structure your view and properties exactly the way you want them to be. You can give a high priority to the ticket, assign it to someone, and move it to the status “In progress”. You can also add tags if you want. When it’s time to reply, simply use the comments section (Pro tip: start your comment with # if you want to keep it as an internal comment):
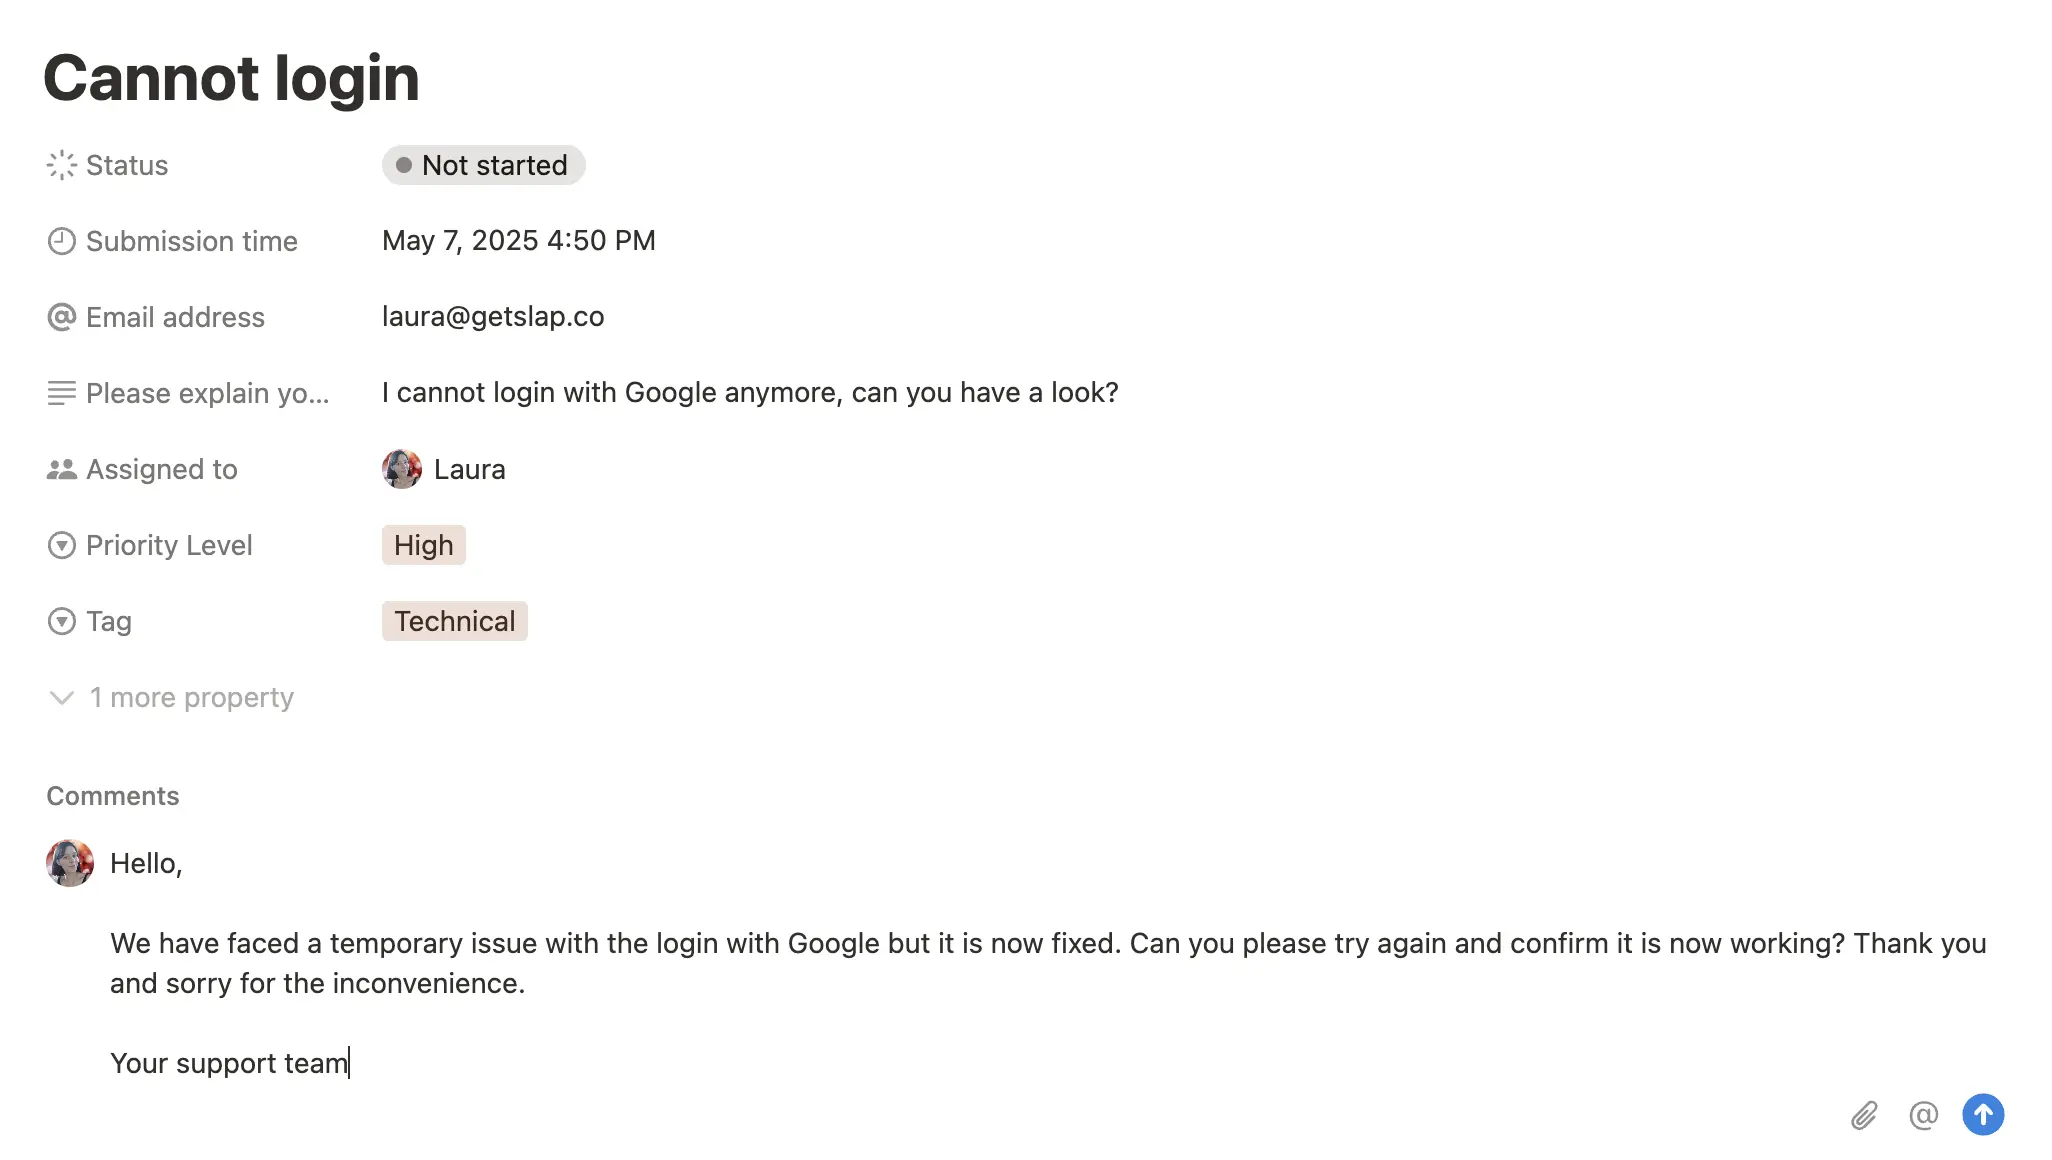
Your client will receive the answer by email, sent directly from your existing support email address. And the reply will also appear in the comment section:
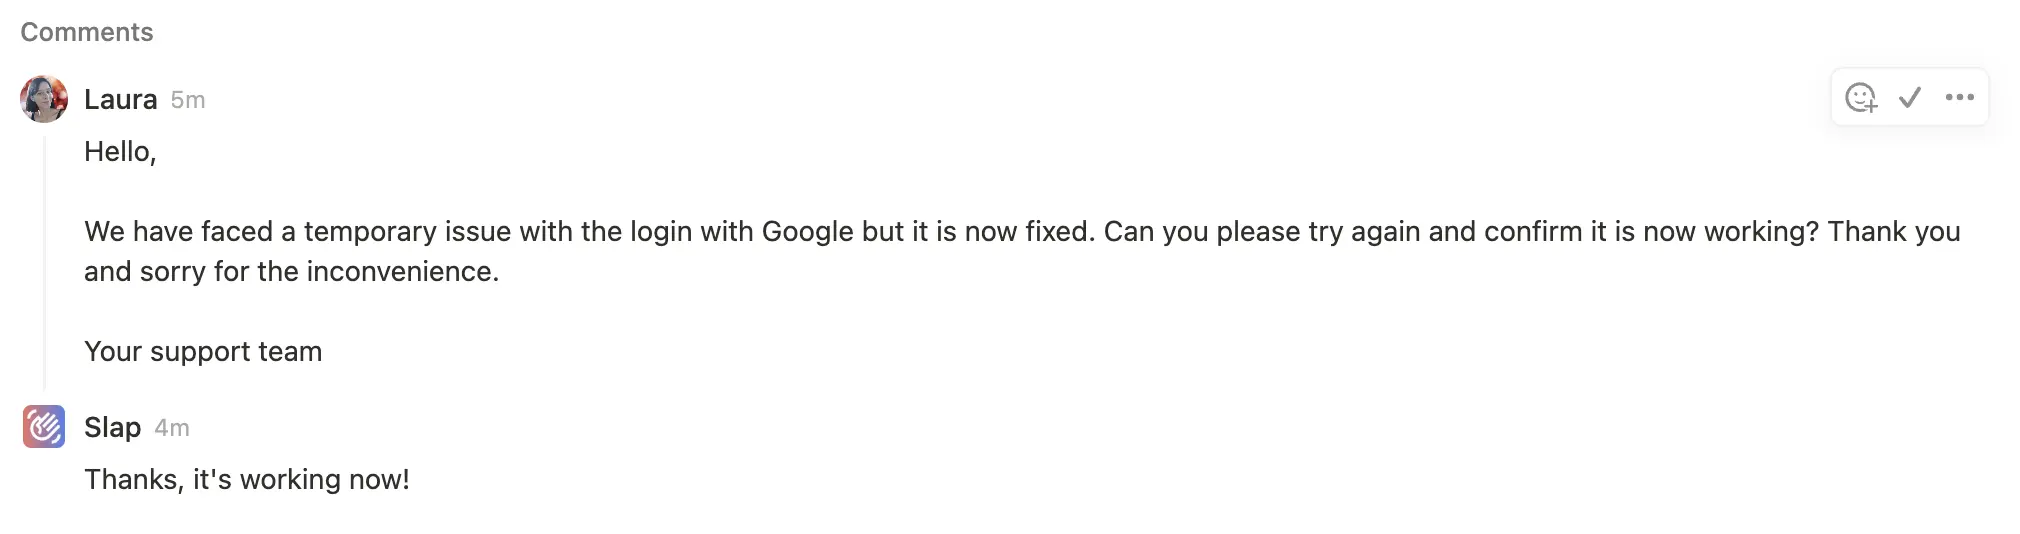
The whole conversation is kept on the ticket. No need to switch between tools. No chaos from sharing an inbox with your team. A simple system that completely fits into your Notion workspace and allows endless customization. To give you a clearer picture of how this works in practice, let’s look at a real-world example.
Real-world success: Hear from a happy Slap User

Don’t just take our word for it. Check out how Leigh Share, founder of WePixel, transformed their ticketing system using Notion Forms and Slap:
How would you describe your workflow before using Slap? “We were using a Notion form to capture client requests, as a form of ticketing system. This works well for organisation, but replies had to go out via email. That meant responses were happening in a completely separate thread, with no visibility in Notion. Messy and hard to track. We were basically losing the context of conversations once the form was submitted.”
How are you using Slap to manage client requests within Notion? “Now, clients fill out the same Notion form, which creates a ticket in our support board. From there, we can respond to the client directly in Notion using Slap. The reply gets emailed to them from our support address, and any responses come straight back into that same Notion ticket. It keeps the entire conversation in one place, without me ever needing to jump into Gmail.”
What benefits have you noticed since implementing Slap? “The biggest win is clarity. Everything related to a request is in one place. It’s also saved lots of time switching between tools and digging for context. A huge improvement is that anyone with access to the Notion board can now see the full conversation thread on a ticket, not just the mailbox owner. That’s made team collaboration much smoother and ensures nothing falls through the cracks if someone’s away or needs to pick something up.”
What do you like most about using Slap? “Honestly, it’s the simplicity. The ability to keep all communication tied to the original request in Notion has removed a lot of friction from our process. It feels like the missing piece we didn’t realise we needed.”
Setting up your Notion Ticketing System step by step
Setting up your Notion ticketing system is a pretty straightforward process. The setup is divided into two parts: the first part in Notion, and the second in Slap. Let’s get started.
Part 1: Create your Notion Form
Notion Forms let you create custom forms that feed directly into a Notion database. And the best part? They’re available on all Notion plans!
1. Open a new Notion page.
2. Type /form and select “Form”. Or, you can create a form from an existing Notion database by clicking “+ Add a view” and selecting “Form”.
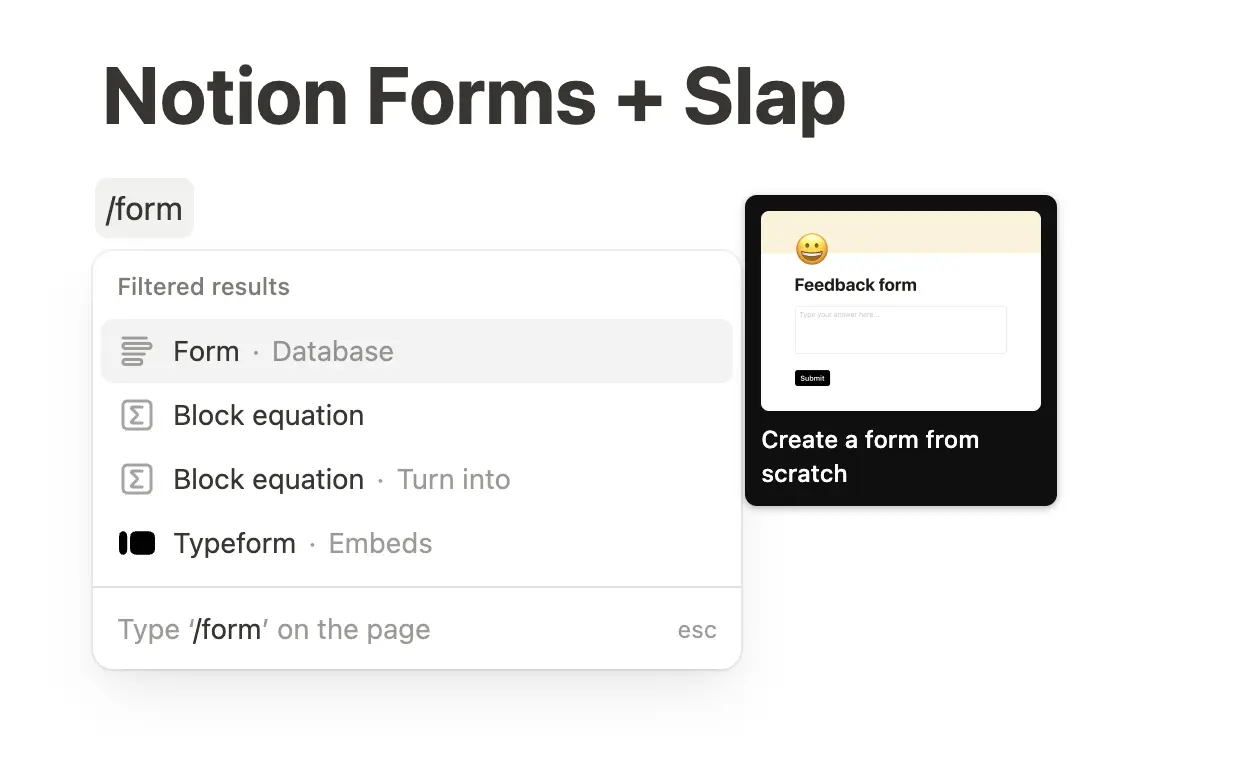
3. Now you’re in the form builder interface. Use the + button to add new questions. There are different types of questions you can choose from, like text, number, multiple choice, and more. Each has its own options, like making a question required or allowing long answers.
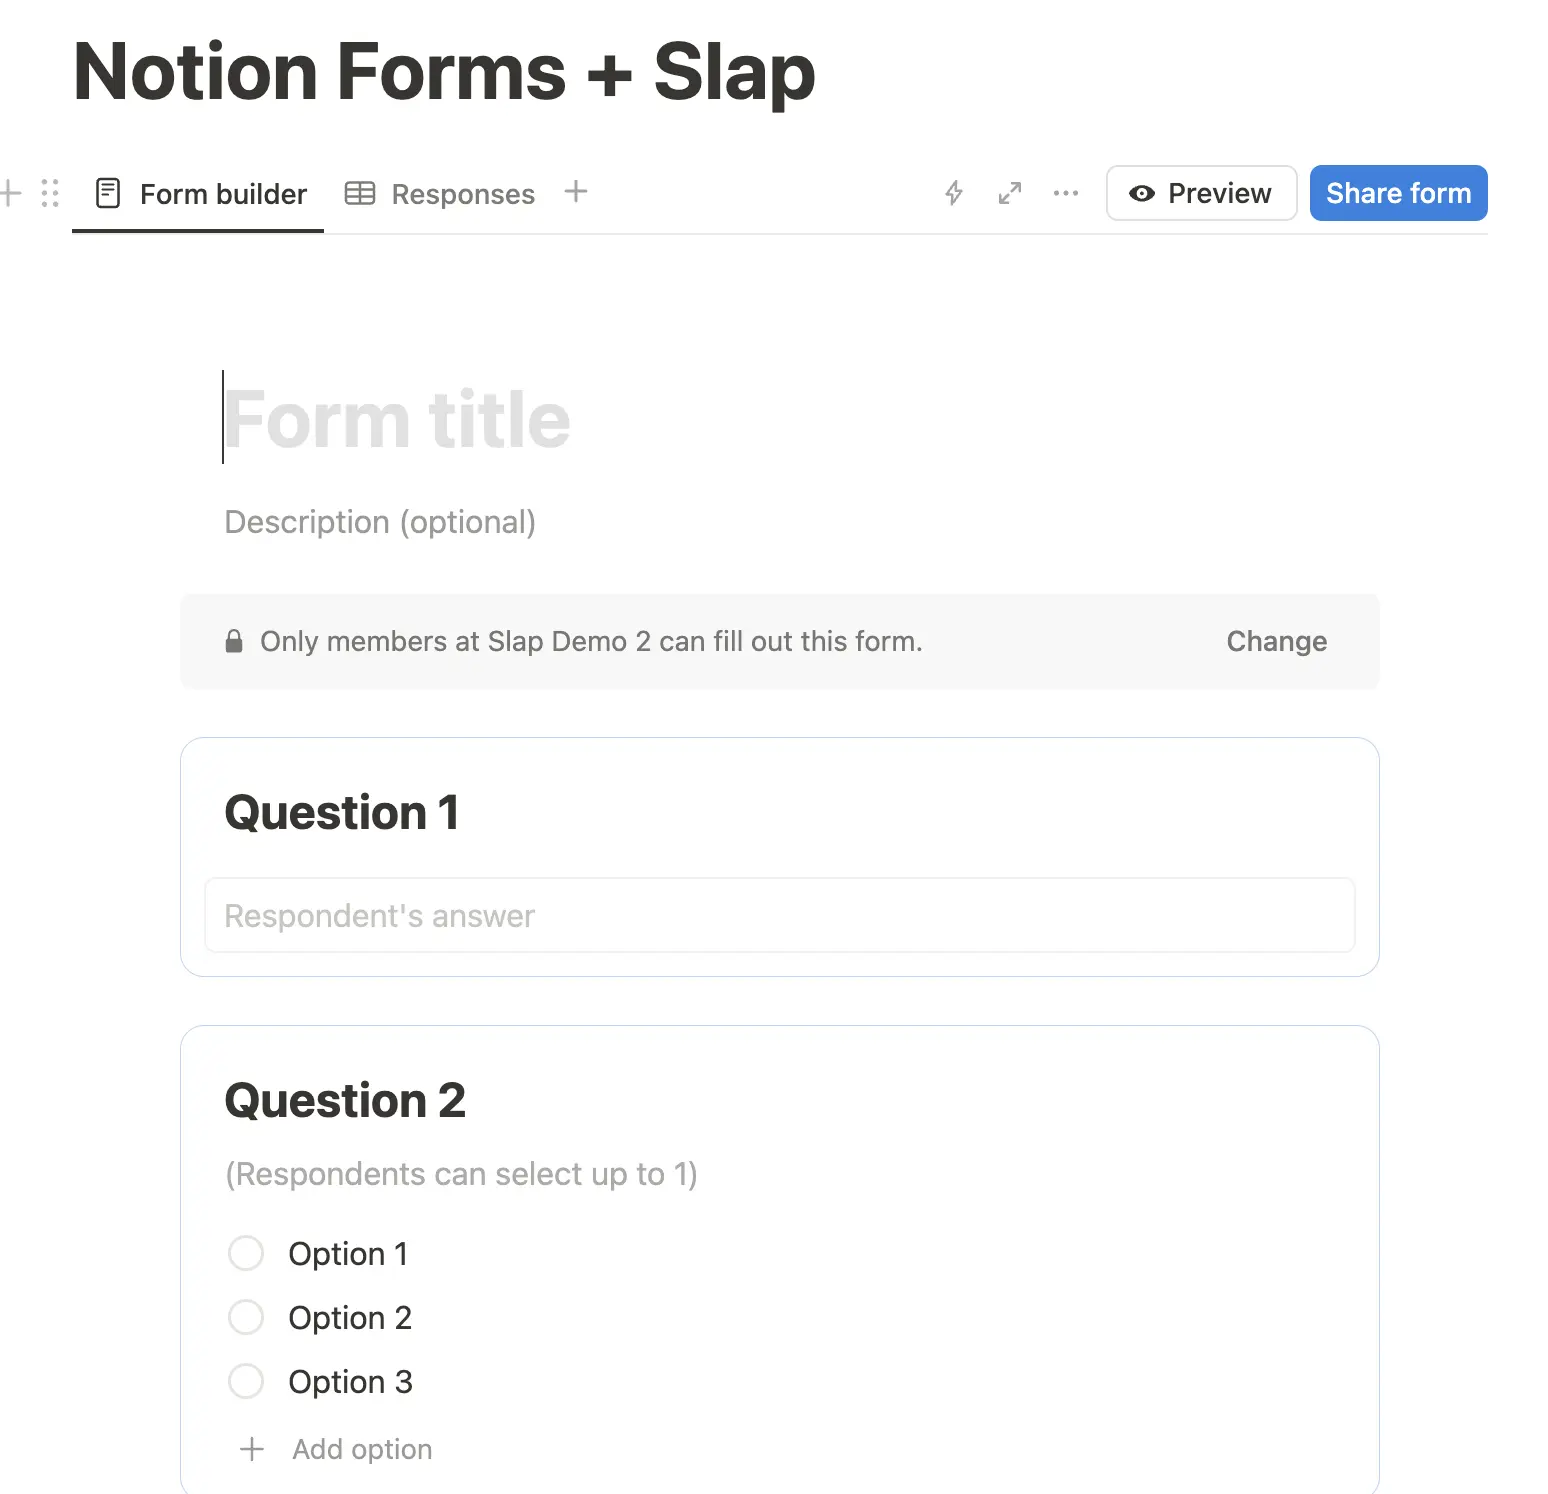
4. Click “Preview” to see how your form will look to users.
5. Once you’re happy with your form, click the “Share form” button in the top right corner. Make sure “Public access” is turned on so anyone with the link can submit the form.
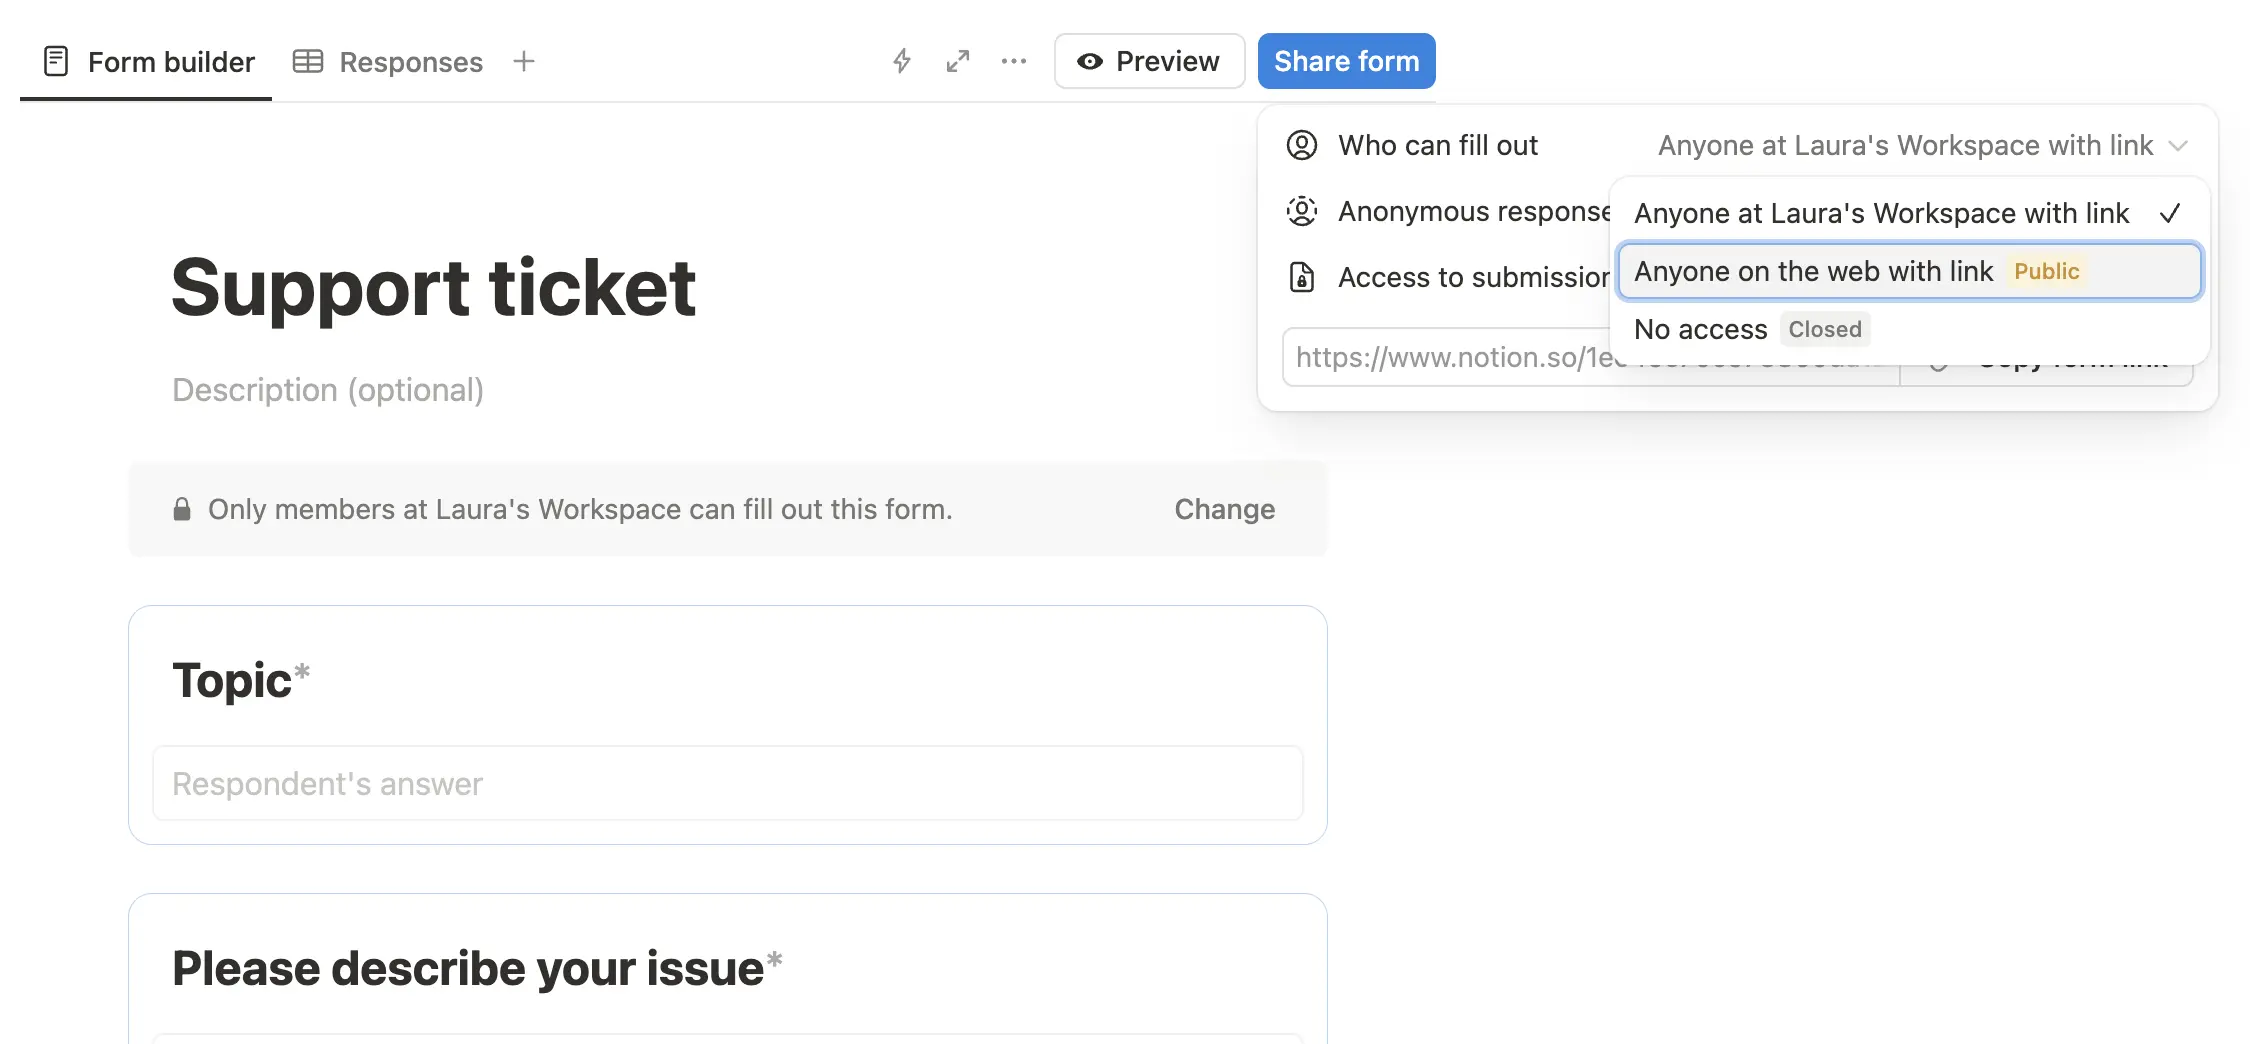
6. You can copy the shareable link or even embed the form directly into your website (check out how to do it here ).
Part 2: Set up Slap, your email integration
Integrating Slap is the magic trick that turns your one-way Notion Form into a dynamic ticketing system!
- Create your Slap account on getslap.co . There is a free trial and no credit card required so you can give it a go without risk.
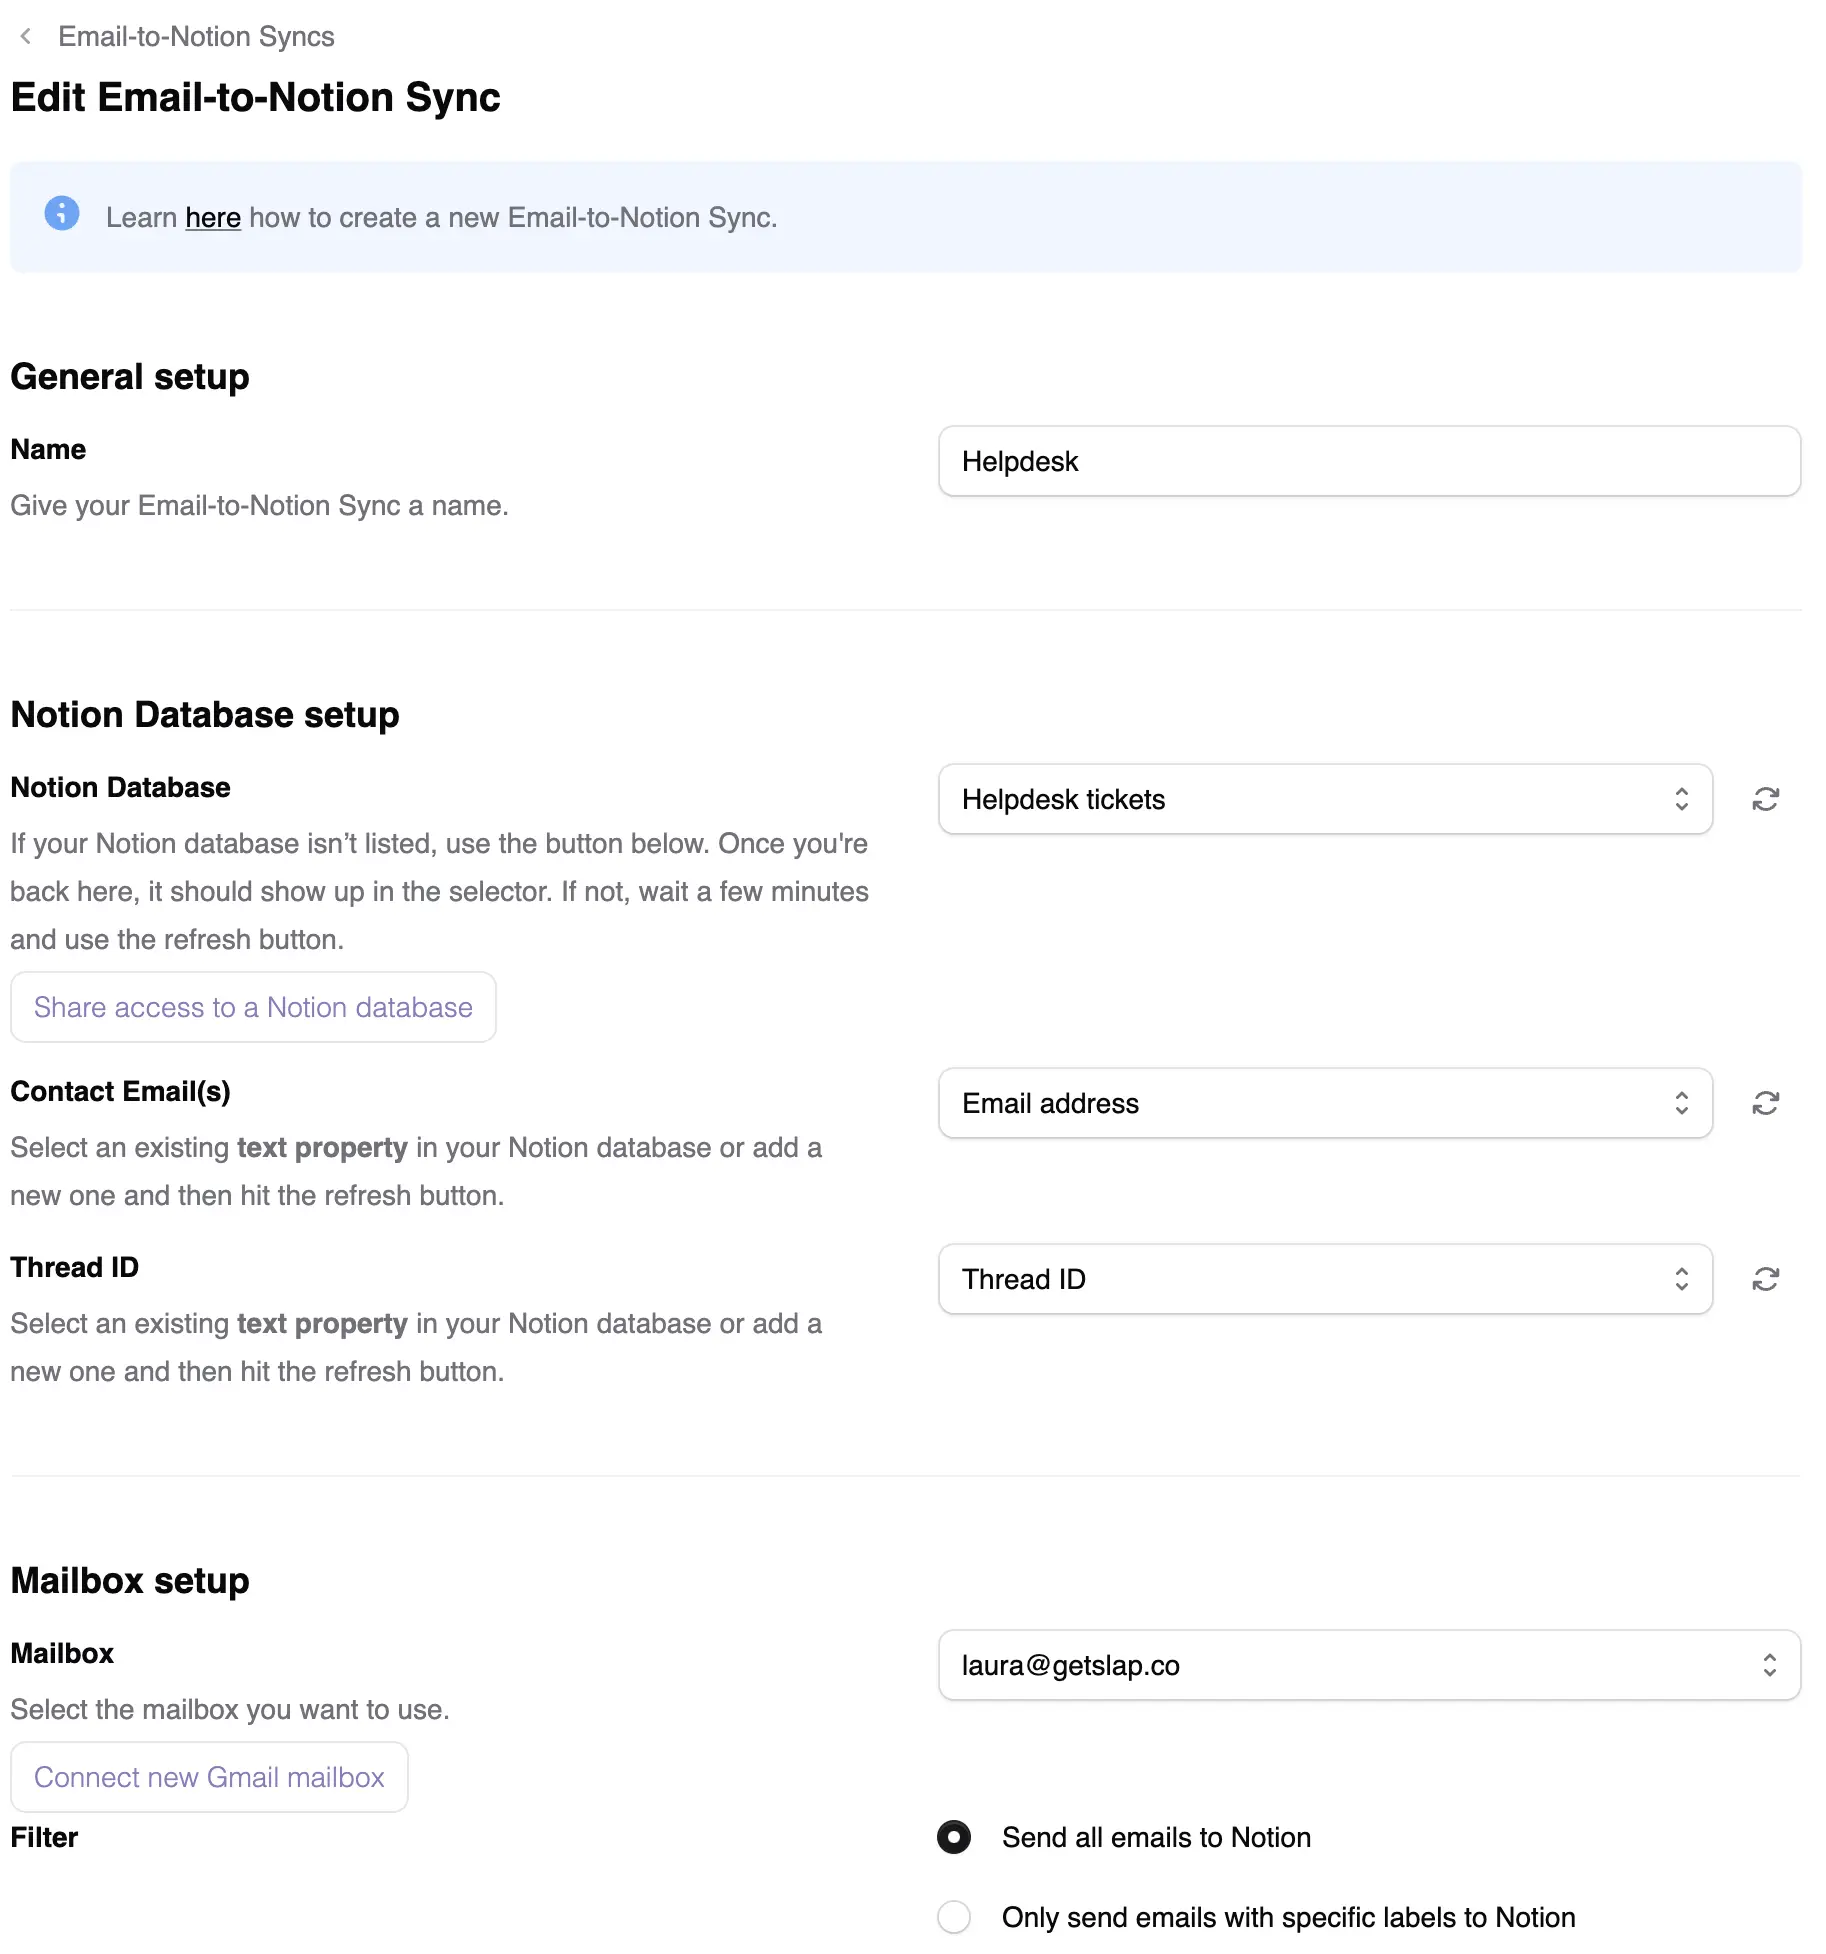
- Once you’re logged in, you’ll be guided through creating your first “Email-to-Notion” sync.
- Pick the Notion database that’s linked to your Notion Form. This is where your form submissions end up.
- In your Form, you asked for the email of the client. Use this as “Email property” in your Slap setup.
- In your Notion database, add a text property named “Thread ID”. Slap uses this unique identifier to link email conversations to the right Notion ticket. Pro tip: to keep your Notion database clean, hide this property, as it’s technical information you don’t need to interact with directly.
- Follow the instructions to connect your support mailbox to Slap. This is the email address your clients will get replies from.
- You’re all set! Make a test by filling out your form and then reply from the comment section in Notion. An email will be sent from your support mailbox. You can reply and verify that the reply also ends up in the comment section of the ticket in Notion.
Conclusion: Seamless customer support, right within Notion
By combining Notion Forms with Slap’s smart email integration, you can create a robust and user-friendly ticketing system right inside your Notion workspace. This means you can get rid of those expensive, separate platforms and keep all your client communication organized and accessible. Empower your team, make your support workflow smoother, and provide awesome service – all without leaving Notion!